Bootstrapping Cloudless Infrastructure
Every system starts somewhere.
cloudless-infra is that starting point — a streamlined Terraform foundation designed for rapid prototyping with rigor. It sets your naming, environment, and context once, then shares that discipline across every module.
It’s not a framework.
It’s not an opinionated meta-module.
It’s the first block — the solid foundation every build starts from.
cloudless-infra helps you get started fast, letting you build immediately while staying minimal and foundational. It gives you just enough structure to move quickly, without adding anything you don’t need.
What it does
- Provides a standard context (
namespace,stage,region, etc.) - Applies consistent tagging via CloudPosse
null-label - Defines shared locals for region, environment, and naming
- Exposes reusable outputs like
context,tags, andlabel - Acts as a “root include” for every other module
And just as important:
- It doesn’t create AWS resources by itself
- It doesn’t lock you to a structure
- It doesn’t depend on any external tooling
It’s zero-opinion infrastructure glue.
Context
I kept finding myself bootstrapping new Terraform root modules in exactly the same way — defining labels, locals, and AWS context. Every new project began with this familiar pattern:
# main.tf
module "label" {
  source  = "cloudposse/label/null"
  version = "0.25.0"

  namespace = local.namespace
  name      = local.name
}

data "aws_caller_identity" "current" {}

locals {
  profile    = var.profile
  region     = var.region
  identity   = data.aws_caller_identity.current
  account_id = local.identity.account_id
  name       = var.name
  namespace  = var.namespace
  id         = module.label.id
  # ...
}
# variables.tf
variable "namespace" {
  type = string
  default = null
}

variable "profile" {
  type = string
  default = null
}
# ...

# outputs.tf
output env {
    value = {
        profile = local.profile
        region = local.region
        namespace = module.label.namespace
        name = module.label.name
        id = module.label.id
        account_id = local.account_id
    }
}

# terraform.tf
provider "aws" {
  region = local.region
}

terraform {
  required_version = "~> 1.12.2"

  required_providers {
    aws = {
      source  = "hashicorp/aws"
      version = "~> 6.5.0"
    }
  }
}
My environment setup always looked like this — minimal but consistent:
AWS_PROFILE=ql4b
AWS_REGION=us-east-1
NAMESPACE=cloudless
NAME=project

TF_VAR_name=${NAME}
TF_VAR_namespace=${NAMESPACE}
TF_VAR_region=${AWS_REGION}
TF_VAR_profile=${AWS_PROFILE}

TERRAFORM_VERSION="v1.13.3"
TERRAFORM_BIN="/usr/local/bin/terraform-$TERRAFORM_VERSION"
This setup is intentionally minimal — a single workspace, a single AWS account — but it’s how I start almost every prototype.
When I want to test a pattern or an idea, I don’t want to lose time rewriting boilerplate. I want to move fast, but without losing the discipline that keeps things consistent.
That’s why cloudless-infra exists: a one-command bootstrap that gets me from empty folder to ready-to-deploy in seconds.
Avoiding repeated boilerplate setup is only half the battle. Just as important is making sure that every project, environment, and resource follows the same naming and tagging conventions—without having to think about it each time. That’s where consistent use of tools like null-label comes in.
Naming consistency
When you want to stay consistent across projects, the challenge isn’t naming — it’s naming every time.
With the CloudPosse null-label module, you don’t have to reinvent your naming logic for each new stack.
You simply choose the context variables that make sense — namespace, name, stage, tenant, and so on — and the module handles the hierarchy for you.
The result: predictable, uniform resource names and tags across every environment, without thinking twice about it.
Managing Environmen & Terraform Versions
Cloudless uses a minimal Bash-based approach for handling Terraform versions, leveraging a simple source command and a lightweight wrapper script. By defining TERRAFORM_VERSION and TERRAFORM_BIN in the .env file and loading them with the activate script, you can easily pin, switch, and upgrade Terraform versions on a per-project basis without relying on complex dependency managers.
This approach keeps version management straightforward and transparent, allowing you to maintain consistent Terraform versions across your projects with minimal overhead.
The tf wrapper:
ROOT_PATH=$(realpath $(dirname "$0"))
INFRA_PATH="$ROOT_PATH/infra"

"$TERRAFORM_BIN" -chdir=$INFRA_PATH \
  "$@"
The activate file:
set -a
# shellcheck source=/dev/null
source  .env && \
PATH="$(pwd):$PATH"
set +a
Once the variables are set in the .env, simply
source activateAnd you session shell is using the context you have setup.
tf init
tf apply --auto-approve
Bootstrap your workspace with online cloudless-infra
Everything described before — environment setup, version management, activation, and wrapper scripts — will be automatically prepared by cloudless-infra when you bootstrap your project.
Run the following commands to initialize your project and handle all the setup automatically:
mkdir -p myapp && cd myapp
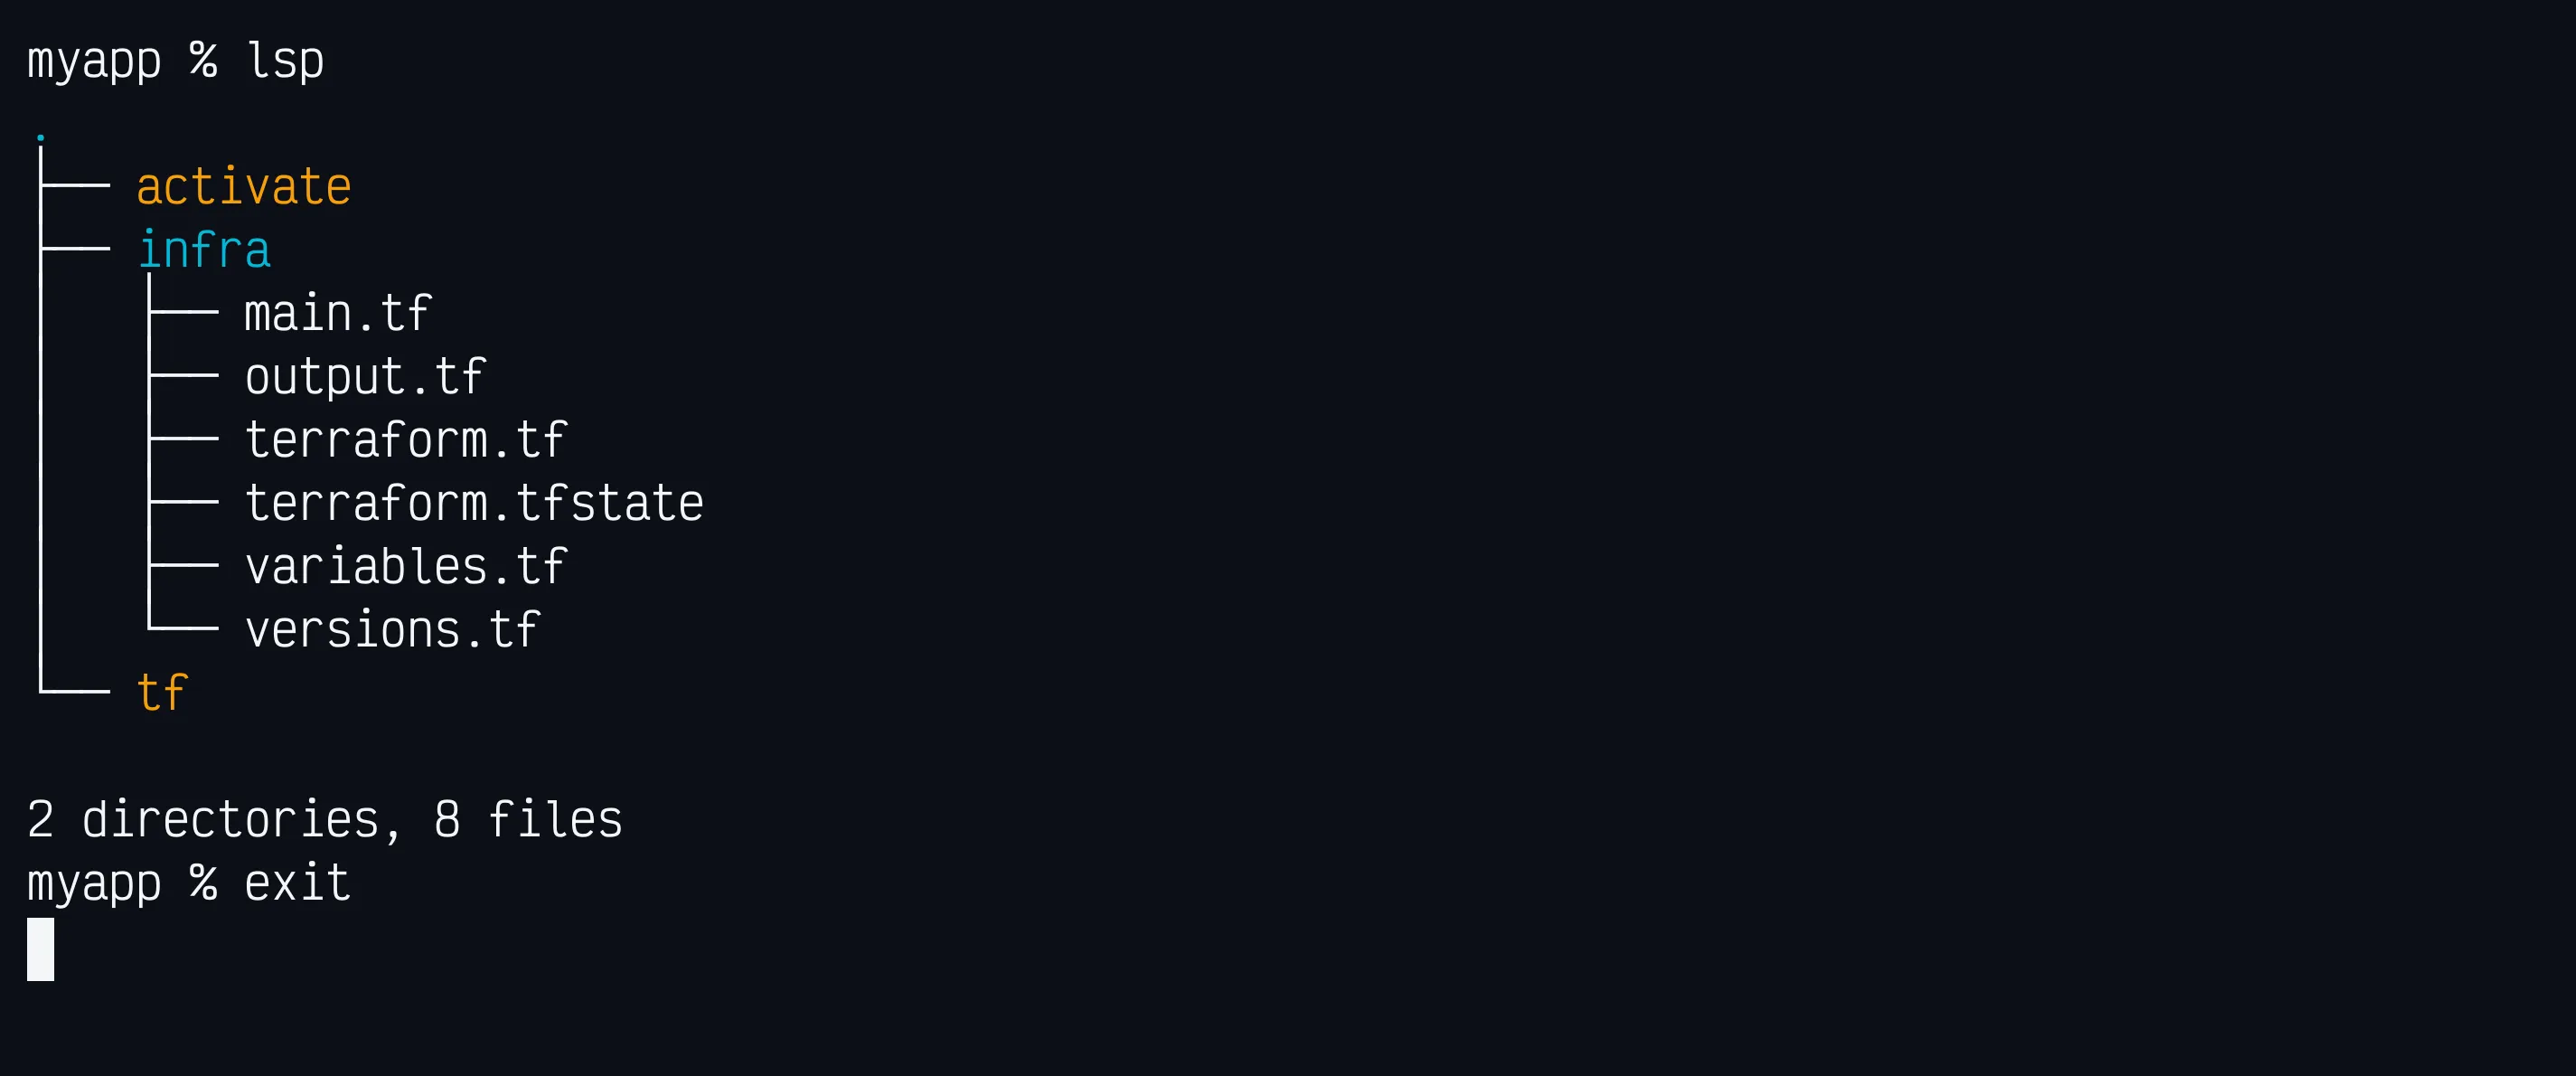
curl -sL https://raw.githubusercontent.com/ql4b/cloudless-infra/main/bootstrap | bashThis initializes your project and creates:
- an
.envfile for environment variables - an
activatescript for loading them - and an
infra/folder containing a bootstrapped Terraform module — ready to initialize your remote backend and manage state consistently.
Configure your environment
Once the bootstrap process completes, open the newly created .env file in your project root.
This file defines your default environment context — values like namespace, stage, and region — along with AWS profile bindings that Terraform can automatically use.
Example:
# cloudless-infra
AWS_PROFILE=ql4b
AWS_REGION=us-east-1
NAMESPACE=cloudless
NAME=sample

TF_VAR_name=${NAME}
TF_VAR_namespace=${NAMESPACE}
TF_VAR_region=${AWS_REGION}
TF_VAR_profile=${AWS_PROFILE}

TERRAFORM_VERSION="v1.12.2"
TERRAFORM_BIN="/usr/local/bin/terraform-$TERRAFORM_VERSION"
Update these values to match your setup.
The activate script will automatically load them whenever you source it, ensuring your Terraform environment stays consistent across sessions.
Once your .env file is ready, activate your environment.
Activating Your Environment
Before running Terraform, load your environment variables:
source activateThe activate script reads your .env file and exports its variables into the current shell session, creating a lightweight, context-aware environment that matches the conventions defined in cloudless-infra. It also updates your prompt with the active context so you can visually confirm which workspace and credentials you’re using.
The tf wrapper (optional but recommended)
The scaffold includes a tiny tf wrapper script so you can pin and consistently invoke Terraform across projects.
- It reads
TERRAFORM_BINfrom your.env(for example/usr/local/bin/terraform-v1.12.2). - If
TERRAFORM_BINis not set or missing, it falls back to the firstterraformfound on yourPATH. - It simply forwards any arguments to Terraform (
tf plan,tf apply, etc.), so you don’t need to remember which binary/version to use in each repo.
Because the bootstrap adds the project directory to your PATH, you can simply run tf instead of ./tf from anywhere inside the repository.
Check it works:
source activate     # ensures TERRAFORM_BIN is exported
tf version
You should see the pinned Terraform version.
Initialize & Apply
From the folder that contains your Terraform configuration:
Initialize providers, modules and apply changes
tf init -upgrade
tf apply -auto-approve
env = {
"account_id" = "703177223665"
"id" = "cloudless-myapp"
"name" = "myapp"
"namespace" = "cloudless"
"profile" = "ql4b"
"region" = "us-east-1"
}Demo

GitHub repository
Bootstrap your next project with cloudless-infra github.com/ql4b/cloudless-infra